
Hello, DIY enthusiasts! Are you ready to embark on an exciting home improvement journey and add a personalized touch to your bathroom? Crafting your DIY mirror frame is a fantastic way to do just that. Don’t worry if you’re new to this – we’re here to guide you through the step-by-step process and help you create a beautiful DIY and functional mirror frame for your bathroom.
Materials and Tools
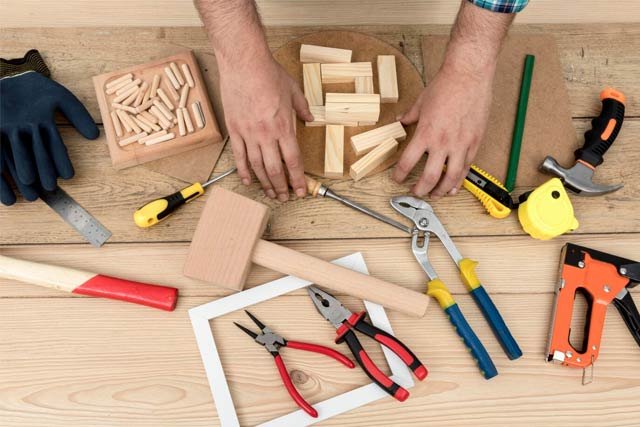
Before we dive into the steps, let’s gather all the materials and tools you’ll need for this project. Having everything prepared in advance will make the process smoother.
Mirror Selection:
Start by identifying the mirror you want to frame. Measure its dimensions to determine the frame size you’ll be constructing.
Wood Selection:
Choose your frame’s base material. Standard options include pine, oak, or poplar. The choice of wood can significantly impact the final look of your structure.
Cutting Tools:
To cut the wood, you’ll need either a miter saw or a hand saw. Don’t fret; we’ll guide you through the angles and cuts.
Smoothing Tools:
To give your frame a polished finish, gather sandpaper and a sanding block to eliminate rough edges and surfaces.
Adhesive:
Wood glue is essential to bond the frame pieces together securely.
Clamps:
These are handy for holding the frame while the glue sets, ensuring everything stays aligned.
Fasteners:
Depending on your preference and experience, you can use nails, screws, or a brad nailer to secure the frame pieces.
Finish Options:
Enhance your frame’s aesthetics with paint, stain, or a protective finish. Your creativity can shine here!
Hanging Hardware:
For mounting your framed mirror on the bathroom wall, you’ll need the right hanging hardware.
Measure and Cut

The first step in your DIY mirror frame for your bathroom project is to measure and cut the wood that will form the foundation of your frame.
Start by measuring your mirror’s dimensions accurately. This measurement will serve as the basis for determining the size of your frame.
Select your wood, whether it’s pine, oak, or poplar, and then decide on the width and style of your frame.
Using either a miter saw or a hand saw, cut the wood at the appropriate angles and lengths. Remember that precision is vital, so take your time and double-check your measurements.
Sand It Smooth
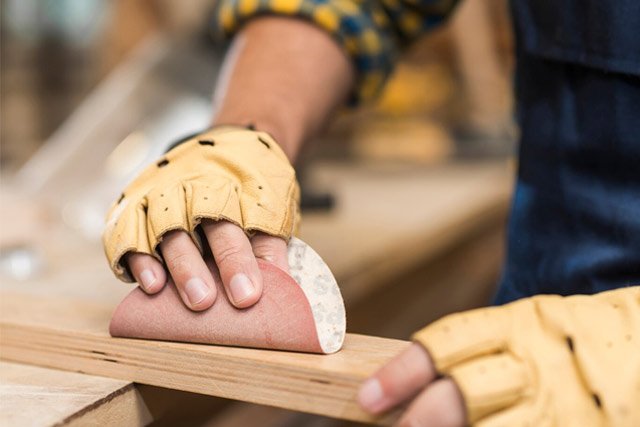
Now that your frame pieces are cut and ready, make them smooth and splinter-free.
Use sandpaper and a sanding block to gently remove any rough spots from the cut edges and surfaces of the wood. This step will not only enhance the frame’s appearance but also ensure safety.
Assemble the Frame
With your frame pieces smoothed and ready, it’s time to assemble the frame itself.
Apply wood glue to the mitered corners of the frame pieces. This adhesive will help secure the frame’s structure.
Join the frame pieces together, aligning them perfectly. To ensure a tight fit, use clamps to hold them in place while the glue dries.
To reinforce the joints for added stability, you can use nails, screws, or a brad nailer. The choice here depends on your preference and experience level.
Finish It Up
Now that your frame is assembled, it’s time to add that personalized touch.
Get creative and choose a paint color, stain, or finish that complements your bathroom decor. Let your imagination run wild, but let it dry completely before moving on to the next step.
Mount Your Beautiful Creation
With your frame looking fantastic, it’s time to display your handiwork proudly.
Attach hanging hardware to the back of your frame to ensure it can be securely and levelly mounted on the bathroom wall.
When you’re ready, hang your framed mirror on the wall. Step back and admire your craftsmanship. You’ve just given your bathroom a touch of elegance and personal style!
Customization Ideas

Remember that your DIY mirror frame is a blank canvas, and you can add your unique touch. Here are a few ideas to spark your creativity:
Decorative Moldings: Add decorative moldings to your frame for an extra touch of elegance.
Colorful Choices: Choose paint or stain colors that match your bathroom decor or represent a vibrant accent.
Mosaic Magic: Experiment with mirror tiles to create a captivating mosaic effect.
Remember, your bathroom mirror frame project is not just about the finished product; it’s also about the journey. Embrace the creative process, and don’t be afraid to make it your own.
Safety First
Always prioritize safety when working on DIY projects. Follow the instructions and safety precautions that come with your tools and materials. Safety goggles and gloves are suitable accessories to have on hands and feet.
Conclusion
This DIY mirror frame project is a great way to transform your bathroom look and feel, even for beginners. It’s a creative outlet and a chance to personalize your space, right down to the Bathroom Subflooring, and you’ll be proud of the results. Enjoy the journey of crafting and beautifying your bathroom with your unique touch! Happy crafting!


