
Embarking on a transformative journey to enhance your bathroom with a board and batten wall treatment is exciting. Drawing upon years of experience, including various board and batten projects ranging from floor-to-ceiling accents to intricate designs with added trim molding, I’m here to share comprehensive insights and invaluable tips to make your DIY venture a resounding success.
1- Materials You’ll Need
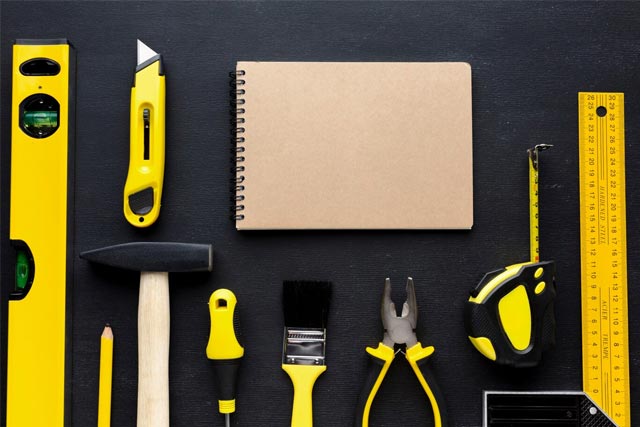
Before we delve into the comprehensive guide, let’s ensure you have all the materials for a successful bathroom board and batten project:
Item 1. MDF Boards or Plywood
Choose the thickness that suits your preferences and budget.
Item 2. Battens
These vertical strips will bring your design to life. Select a size that complements your vision.
Item 3. Level and Measuring Tape
Essential tools for precise installation.
Item 4. Nail Gun or Adhesive
Choose the method that aligns with your wall type and personal preference.
Item 5. Saw
This will be useful for cutting boards and battens to the desired lengths.
Item 6. Wood Filler and Sandpaper
Achieve a flawless finish with these tools.
Item 7. Primer and Paint
Opt for colors harmonizing with your bathroom’s aesthetic.
2- Helpful Tips

Tip 1. Choose the Right Material for the Room
If your board and batten adventure takes you to wet areas like bathrooms or kitchens, opt for PVC or Primed Pine trim. PVC, being 100% waterproof, is the superior choice. Pine is a great alternative, but steer clear of MDF in wet areas. MDF, once wet, expands irreversibly. Choose wisely from the start for a durable hardwood floor and a beautiful finish.
Additional Advice:
- PVC trim is available at major home improvement stores, typically in the exterior trim section.
- Consider your climate; Primed Pine is preferable in humid conditions, while MDF might be suitable for dry climates.
Tip 2. Address Textured Walls
Covering medium to heavy wall textures is crucial for a professional-looking board and batten installation. Skim coating or using brownboard can provide a smooth canvas for your project. Don’t skip this step if you want your DIY to look like a pro did it.
Additional Advice:
- Check out a reliable skim coat tutorial for detailed guidance.
- Consider using a wainscoting calculator to streamline the process.
Tip 3. Paint Your Wall First
For a seamless finish, paint your wall before installing the batten trim. This will save you time and effort, avoiding the need to cut in around each board.
Additional Advice:
- Consider masking off the room and spraying the entire wall for an efficient and professional look.
Tip 4. Baseboards Matter
Ensure that your battens align flush with your baseboards. If your baseboards are thin, explore creative solutions like angling the ends of your boards or adding an extra horizontal batten.
Additional Advice:
- Aim for a seamless connection between vertical battens and baseboards.
- Try a good-quality subfloor in bathroom to avoid damage to the baseboards.
Tip 5. Measuring Your Boxes
Avoid complex math by using a wainscoting calculator to determine the placement of each batten. This tool simplifies the process and ensures precision in creating your board and batten pattern.
Additional Advice:
- Aim for battens to be as close to 16″ apart as possible for traditional board and batten.
Tip 6. Install Your Top Piece First
Install a thicker 1×6″ board horizontally before the vertical battens for traditional board and batten—this piece, when level, serves as a crucial foundation for the overall design.
Additional Advice:
- The top piece provides stability and a polished finish to the board and batten treatment.
Tip 7. Scarf Joint Your Seams
Use a scarf joint to blend two boards seamlessly when dealing with walls longer than your boards. With a 22.5-degree angle, this technique creates a professional and tight fit.
Additional Advice:
- A scarf joint adds sophistication and eliminates visible seams for a polished appearance.
Tip 8. Measure Each Batten Individually
Avoid assumptions about your baseboards’ level. Measure each batten individually to ensure a precise fit, minimizing the need for excessive caulk and achieving a professional-looking result.
Additional Advice:
- Use a laser measurer for quick and accurate measurements.
Tip 9. Angle Your Nails
Ensure a secure fit by shooting brad nails into the wall at an angle. This technique creates a locking effect behind the wall, eliminating the necessity for precise stud alignment.
Additional Advice:
- Alternating the angle of your nails ensures a more robust and stable attachment.
Tip 10. Use a Spacer Board
Simplify the installation process by cutting a spacer board to the size of your boxes. This scrap wood spacer helps align your battens, streamlining the process and saving time.
Additional Advice:
- A spacer board ensures consistent spacing and a faster installation.
Tip 11. Caulk and Wood Fill
While a tedious process, caulking and wood filling are essential for a flawless finish. Overfill nail holes with Dap Plastic Wood Filler and apply caulk along seams for a seamless appearance.
Additional Advice:
- Pack baby wipes to assist in smoothing caulk for a professional finish.
3- Making Board and Batten

Here is the step-by-step procedure for you to follow to make a good-looking board and batten for your bathroom.
Step 1: Plan Your Design
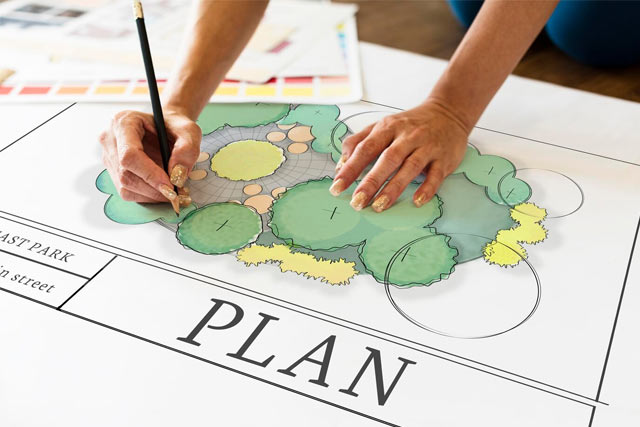
Embarking on a successful DIY journey begins with thoughtful planning. Take a moment to sketch out your board and batten design. Consider the height of the boards, the spacing between battens, and whether you want an entire wall treatment or just a partial accent. This planning stage is crucial for a seamless execution, ensuring that your finished project aligns perfectly with your vision.
Tips:
- Experiment with different design layouts on paper before settling on a final plan.
- Consider how the board and batten complement existing bathroom fixtures and decor.
Step 2: Prepare the Wall
Before diving into the installation process, it’s essential to prep your wall correctly. Clean the surface thoroughly and address any imperfections with spackle. Sand the wall to create a smooth canvas for your board and batten treatment. This initial preparation will set the stage for a professional-looking finish.
Tips:
- Use a quality primer on the wall before attaching boards to ensure better adhesion.
- If your wall has texture, consider sanding it for a more even surface.
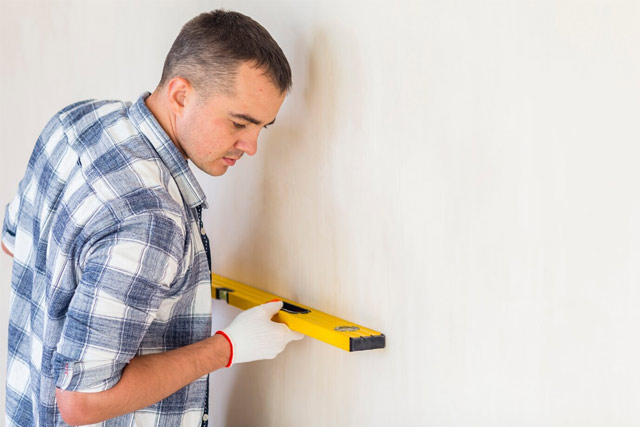
Step 3: Install the Boards

With a clean and prepped wall, it’s time to transform your space. Attach the MDF boards or plywood horizontally to the wall. Use a level to ensure the boards are straight and evenly spaced. Secure the boards using a nail gun or adhesive, depending on your preference and wall type. This foundational step sets the stage for the classic board and batten pattern defining your bathroom’s new aesthetic.
Tips:
- Consider using a temporary ledger board to help ensure a level installation.
- Measure and mark the wall to guide the placement of each board for consistency.
Step 4: Add the Battens
Now comes the creative part—adding the vertical battens. Considering the overall design, measure and cut the battens to your desired length. Install them vertically over the boards, creating the quintessential board and batten pattern. Ensure even spacing between battens, and use a level to maintain straight lines. This step is where your vision takes shape, adding depth and character to your bathroom walls.
Tips:
- Start installing battens in the center of the wall and work outward for balanced spacing.
- Consider using a laser level for precise vertical alignment.
Step 5: Fill, Sand, and Prime
To achieve a polished and seamless finish, pay attention to the details. Fill any gaps or holes with wood filler and use sandpaper to create a smooth surface. This step is crucial for achieving a professional-looking result. Once you’re satisfied with the surface, apply a coat of primer. Primer prepares the surface for paint and enhances the durability of your board and batten treatment.
Tips:
- Use fine-grit sandpaper for a smooth finish before applying primer.
- Apply wood filler generously for a flawless appearance.
Step 6: Paint to Perfection

Now comes the moment you’ve been waiting for—adding color to your creation. Choose a paint color that complements your bathroom’s overall color scheme. Apply at least two coats of paint, allowing each coat to dry thoroughly before moving on to the next. This is your
Opportunity to personalize the space and make a bold statement. Whether you opt for a classic white or a trendy accent color, the paint is the finishing touch that brings your DIY project to life.
Tips:
- Use painter’s tape to achieve clean, sharp lines between the boards and walls.
- Consider a satin or semi-gloss finish for easy cleaning in a bathroom environment.
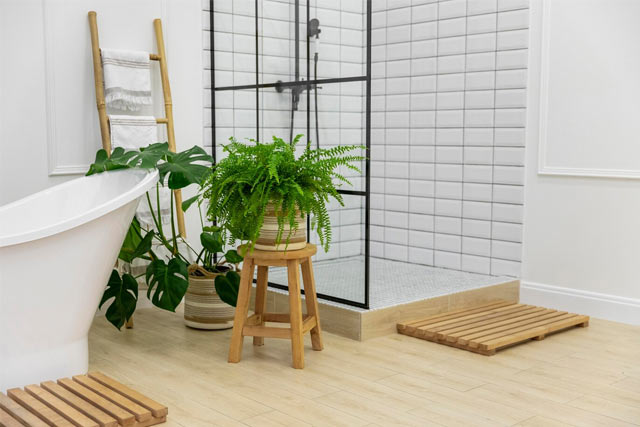
Step 7: Admire Your Handiwork

As the final coat of paint dries, take a step back and admire the transformation. Your bathroom has changed remarkably, now exuding a timeless and elegant ambiance. The board and batten treatment adds aesthetic appeal in addition to the floor in bathroom and gives your space a sense of accomplishment and personalization.
Conclusion
Congratulations! You’ve successfully navigated the DIY board and batten world, turning your bathroom into a personalized haven. This comprehensive guide has equipped you with the knowledge and steps to undertake this transformative project. Now, bask in the satisfaction of a job well done and enjoy your newly elevated bathroom aesthetic. Happy DIY-ing!
It’s not recommended to use MDF in wet areas like bathrooms due to its tendency to expand when exposed to moisture. For such spaces, consider PVC or Primed Pine trim, with PVC being the superior waterproof option.
Yes, especially if your walls have medium to heavy texture. Consider skim-coating the wall or using the brown board to create a smooth surface. This step is crucial for achieving a professional look in your DIY board and batten project.
Painting the wall before installing the batten trim saves time and ensures a cleaner finish. Unless you plan to mask off your room and spray the entire wall, painting first avoids the need to cut in around each board, streamlining the overall process for a more efficient and professional look.


